LATEST ARTICLES

How To Find Transparent PNG Images for Your Designs

There’s nothing worse than saving what you believe to be a transparent PNG, only to discover that the checkered background is still there when you open the file. You can save time by downloading only transparent files from the internet, but how exactly can you make sure of it?

Here’s how you can find transparent PNG images to use in your designs:

  1. Only search for transparent PNGs.
  2. Use a specialized website.
  3. Check the image’s properties.
  4. Make your PNG images transparent.

After reading this article, you’ll know how to find, make, and use transparent PNGs in your designs. PNG files are great for website design thanks to their high-quality and small size, so you’ll want to be familiar with using them. Here’s all you need to know!


Only Search for Transparent PNGs

Searching for a Transparent PNG image

First, you can try filtering your image search results to get only transparent PNGs. This method is straightforward, although you’ll need to be careful. Search engines won’t usually sort out images that are free to use. If you use a copyrighted image in your design, you could find yourself in legal trouble.

Here’s what you can do to search for transparent PNGs on Google:

  1. Conduct your search as usual on Google.
  2. Click on “Images”.
  3. Go to the top menu and find “Tools.”
  4. Go to the “Color” drop-down menu and select “Transparent.”

After doing these steps, all the images in your search results will have a transparent area. You’re much more likely to find transparent PNGs in this way. However, you can filter your search even further.

When you type in the search bar, write the phrase “filetype: png” first. When you do this, Google will only show PNG files, making it much easier to find what you’re looking for. For example, entering “filetype: png dog” will cause Google to bring up PNG images of dogs.

This method is pretty convenient, although you may notice fake transparent PNGs still making their way through your filters. To better refine your search, you’ll want to try the other tips below too.


Use a Specialized Website

Use Laughingbird Software’s royalty-free images

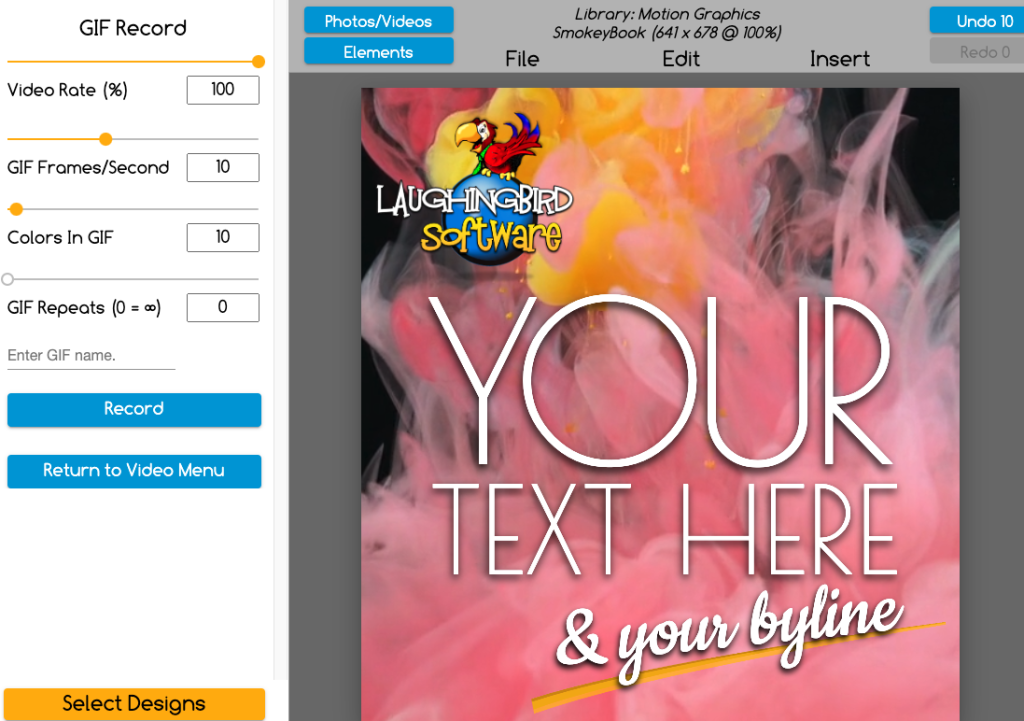
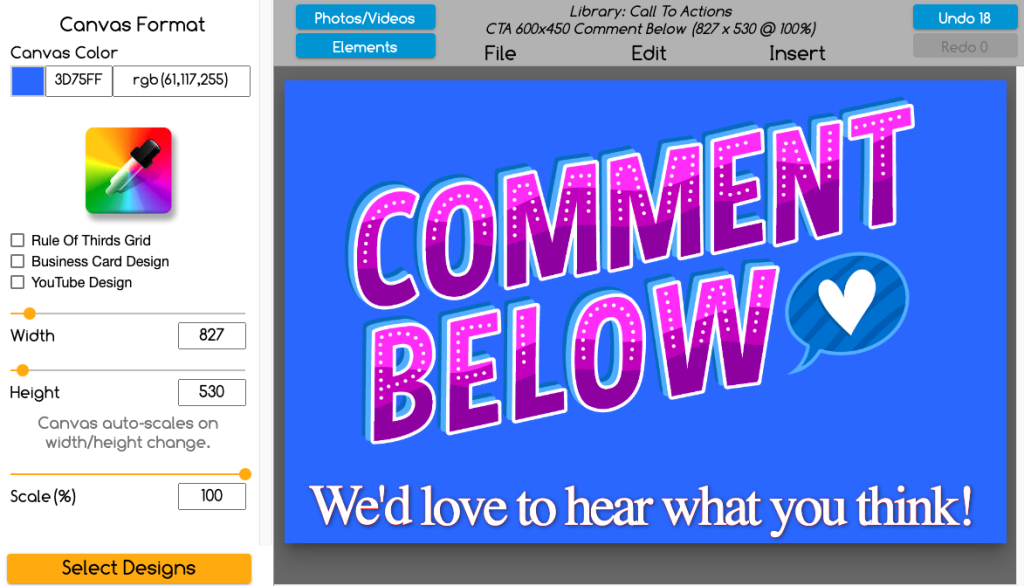
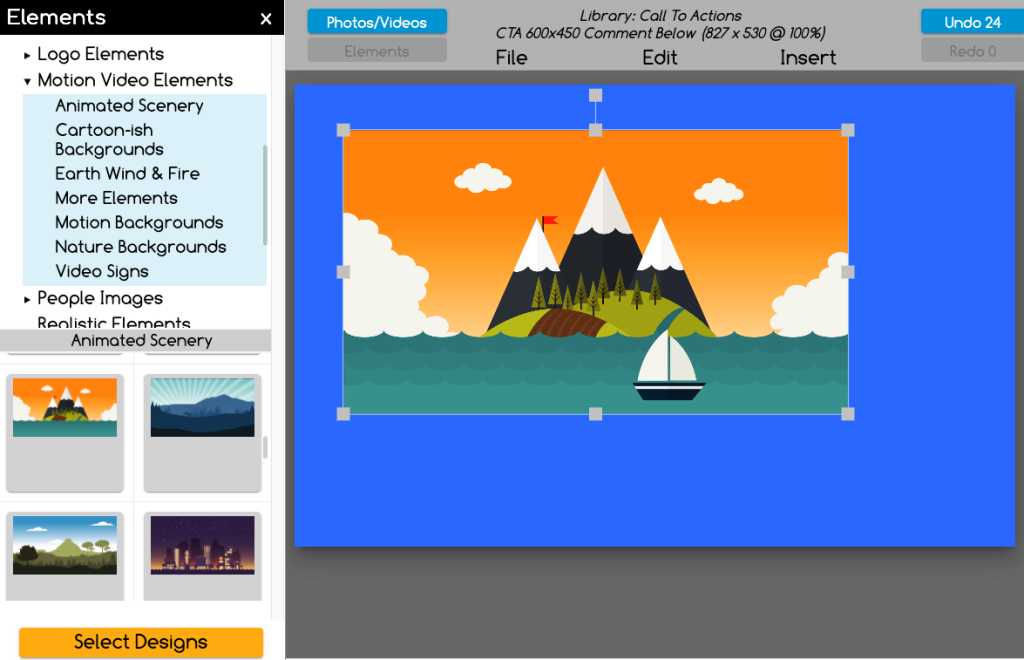
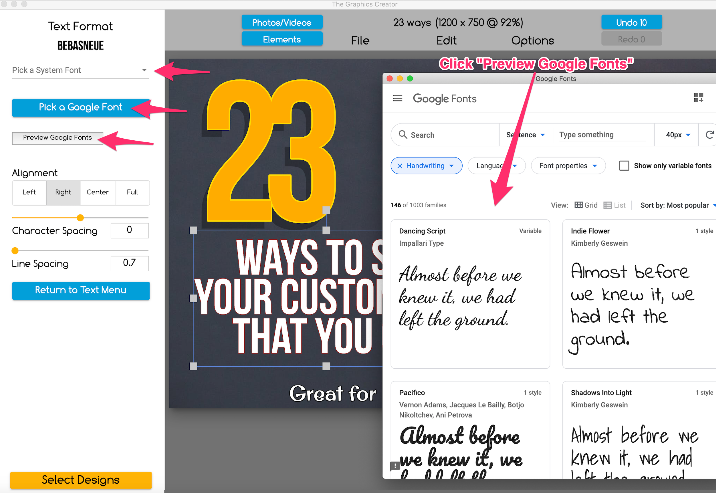
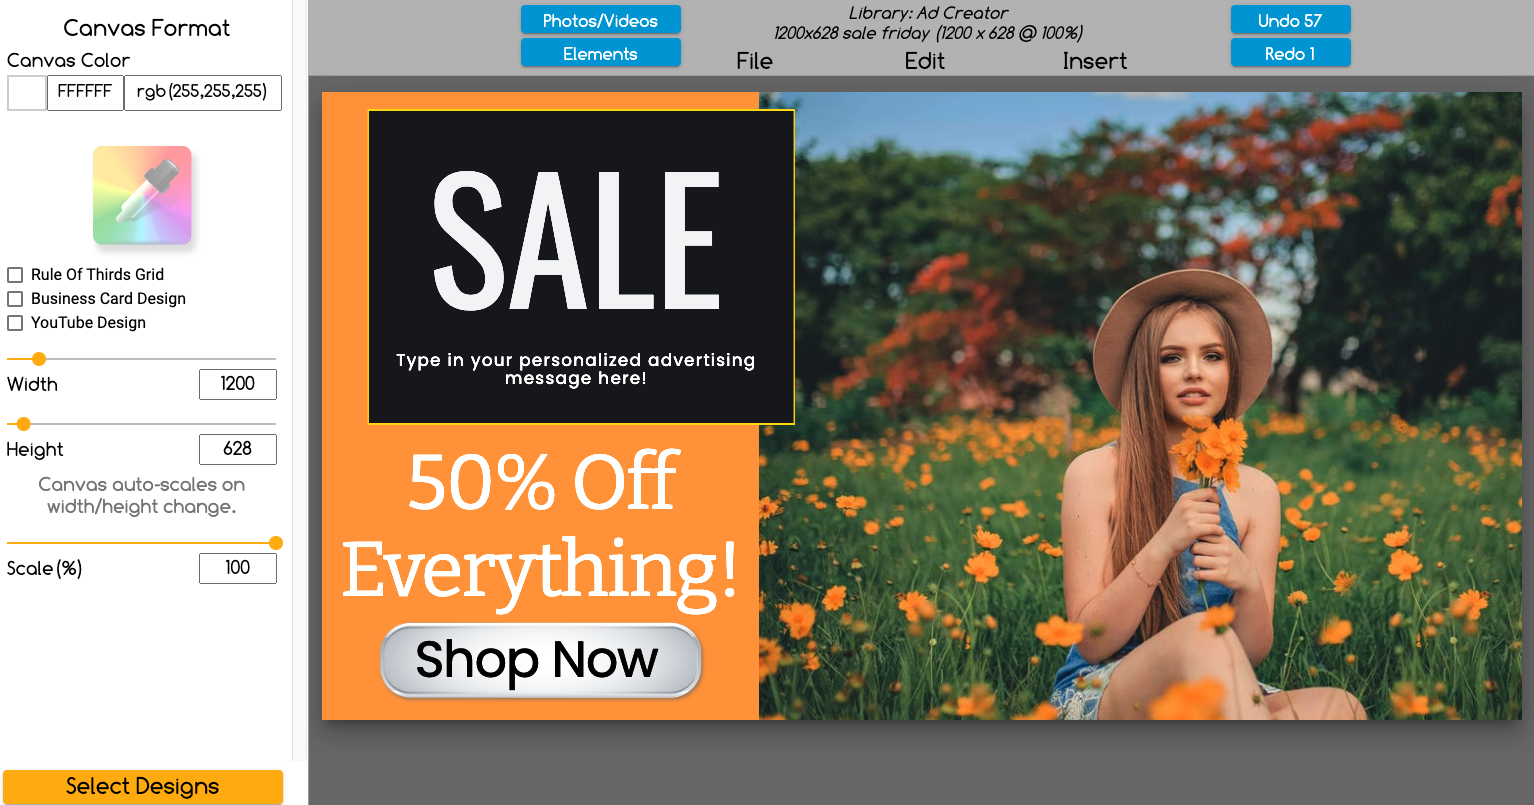
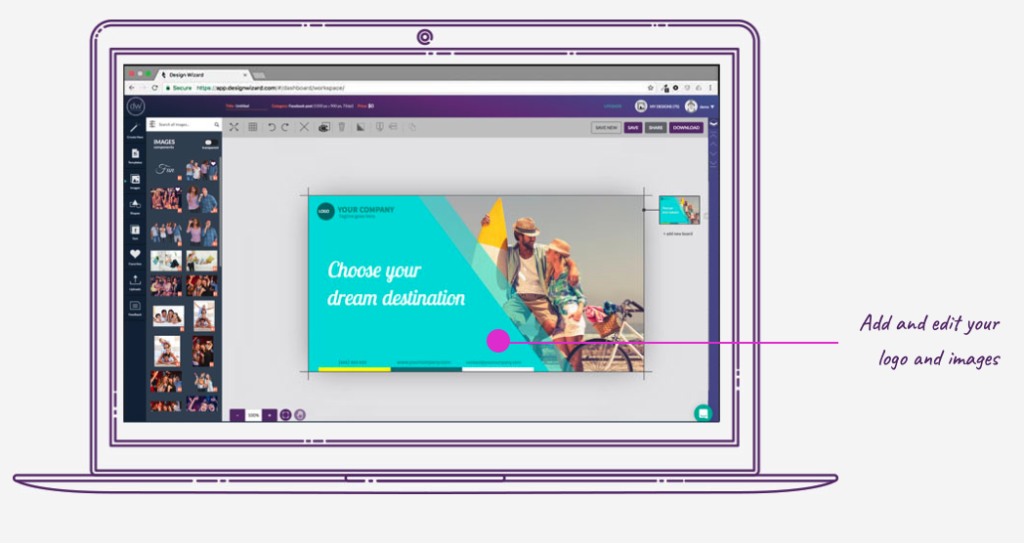
If you don’t want to go through the hassle of sorting through all those images, you can use specialized software designed to make your design endeavors easier, such as Laughingbird’s The Graphics Creator.

One of this site’s main features is that you can add transparent backgrounds to all your PNGs. You can also easily find images that are safe to use and come with transparent backgrounds already, which is very convenient.

Designing goes a lot smoother when you have consistent access to transparent PNG files. You won’t spend all your time sorting through fake PNGs and removing the backgrounds so you can use them.

There are also many other sites that you can find online that claim to offer clear PNGs. However, you should always conduct a quick check into any sites that you find randomly through Google. They may not work or, worse, get malware into your computer.

You also have the option to browse databases of transparent images online. But if you do graphic design often, a design-based website like The Graphics Creator will be the most convenient option. All of the PNGs in The Graphics Creator already have their backgrounds removed, and the site is very safe to use.


Check the Image’s Properties

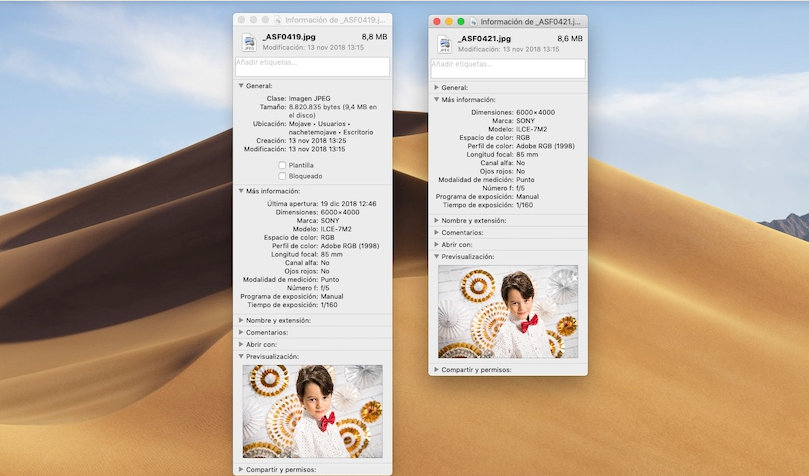
Find an image that you want to use first. Once you have one, you can quickly check that it’s transparent. Some photos still have backgrounds, despite having a “transparent” label.

You can do this by right-clicking the image, then opening the “Properties” menu. If the file is a PNG (and not a JPEG), then it’s likely that the background is transparent. JPEGs don’t support transparency, so they’ll always have a solid background.

Overall, it’s a good idea to check out an image’s properties before you download it—no matter what you’re using it for. There are tons of fake PNGs on the internet.

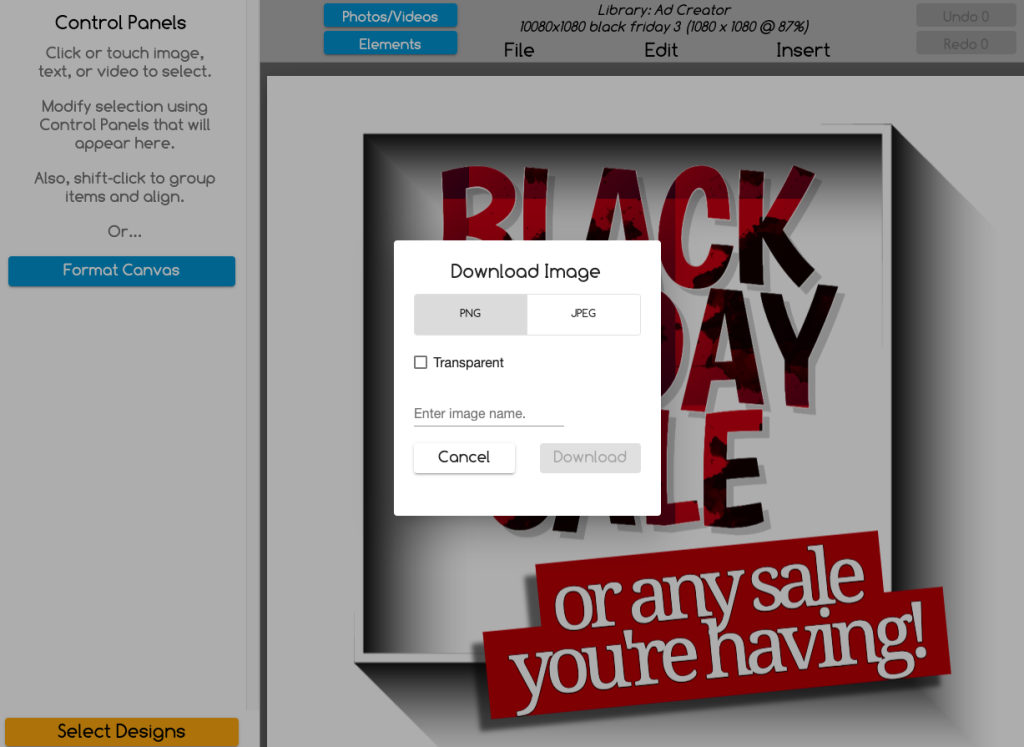
You can avoid having to check the file format by using Laughingbird’s The Graphics Creator, which only offers true PNGs when you search for them.

Why There Are “Fake” Transparent PNGs

There are many websites out there that make “fake” transparent images. You might have already run into them—they still have the checkered background when you open them up in your design software.

These sites do this to make you download the image from their website directly and not through Google images. However, there’s always the risk of getting a virus on your computer if you download from random websites.

Fake PNGs could also be a way to encourage more people to view a website and collect clicks. 

Lastly, fake PNGs could result from someone not understanding what file format to use. They simply saved the file as something other than a PNG, which filled in the transparent background. This person then uploaded the image online without checking that it was in the correct format.

It’s better to be safe online and first check the image’s properties. That way, you know what to expect before you go through the trouble of opening the image in your design software.


How to Make Transparent PNG Images

If all else fails, you can make your PNG images transparent using design software. You don’t need to be an expert graphic designer to do this either—it’s a straightforward process.

  1. First, open the image you want to adjust.
  2. Use your color selection tool (it varies from program to program) to select the image’s background color.
  3. Then, delete all instances of that color. Your software should select all pixels that use that exact shade, making it easy to delete them.

If the image has the white and gray checkerboard as the background, you’ll need to do this twice—once for the white squares, then again for the gray squares.

This option can be troublesome when there are many instances of the color also present in the image you want to use. You may need to reconstruct some of the images when you delete the background.

Removing the background of an image is always an option for designers, even if it’s not the most convenient. As long as you already have access to some design software, you can remove the background on your own.

This short YouTube video covers everything that you need to know to remove backgrounds easily in Photoshop:

Why You Need PNGs for Your Designs

PNG files are the most convenient file to use in most graphic design projects. These file types come with transparent backgrounds, making them better fit into websites and printed media.

Since it can be hard to find transparent images, some people avoid using PNGs in their work. However, they come with several benefits. Transparent backgrounds allow you to add more depth to your design and create a variety of visual effects.

PNG images are the top choice for use on websites. They don’t have large file sizes but retain a very high quality. They also allow for a vast spectrum of colors—up to 16.8 million different colors!

You might have noticed that JPEGs degrade in quality slightly each time they are copied. PNGs don’t have this issue—you can handle them all you want without losing any quality.

PNGs only have one downside: they’re not great for printing. They use RGB colors plus a transparency channel, known as the alpha channel. Meanwhile, printers work better with CMYK colors.

If you need to print your design, save it as a TIFF or some other print-friendly format. But if it’s meant to be seen on a screen, then PNG is the way to go.


How Do I Use Transparent PNG Images?

Colorful vector image isolated on a transparent background!

You can use transparent PNG images by dragging and dropping them onto your design board. Since they don’t have a background, you can organize them in creative ways. This makes it easier to mix multiple images without them covering each other. Your final design will also look less cluttered.

Transparent PNGs come with many uses and are simple to work with. All you need to do is arrange the images as you want on your canvas. Having access to many transparent images will make the designing process much more efficient.

For example, suppose you’re making an e-book cover. In that case, you can easily move around transparent images to ensure the text fits nicely. You’ll want to pay attention to how all the images look together to get a good design.

In short, you can use transparent PNG images however you want. They’re effortless to manipulate, and they don’t have a background you’d need to adjust to fit your design theme. 

Key Takeaways

PNGs you find online often have fake transparent backgrounds. These images can be annoying, especially if you had your heart set on using them. You can make the image transparent using design software or save yourself the trouble and only download real transparent PNGs.

These are some essential design tips that will help you find transparent images easily:

  • Use the Graphics Creator for easy access to transparent PNGs.
  • Filter your image search for transparent PNGs.
  • Inspect the image’s properties before downloading.

How Much to Charge for an Online Banner Design

If you’re a graphic designer or artist, you’ll often need to set prices for online banner design in addition to other design projects. However, you might not always know exactly how much to charge. There are many factors you should consider, including how much time and effort the design will take and your experience.

To charge for an online banner design, consider whether you want to charge hourly or a fixed rate for the design and how experienced you are. Most freelancers make between $10 and $600 for a single banner. You always want to charge for your time, so never go below a set amount.

There are many aspects to consider when pricing your design, so I made sure to break them down in this article. By the end of this piece, you’ll know exactly how much to charge for your digital banners. Let’s get started!

How to Price Online Banner Designs

When setting your digital banner prices, you need to consider four main factors. These include:

  • Your experience level
  • The scope of the project (including how long it will take and the difficulty level)
  • The project’s value
  • Other expenses that come from your pocket

You’ll want to consider how much you’ll charge very carefully. You’ll also want to familiarize yourself with other designers’ rates in your area.

Your experience and situation will change over time, so don’t hesitate to change your pricing models with them.

Bold YouTube Banner Graphics
Lower your expenses and make more money by creating a banner design with affordable software: The above design was created with The Graphics Creator.

Your Experience Level

Your experience level should have the most impact on how much you charge for your banner. If you’re still a beginner, you won’t want to charge as much as an expert in the field. Potential clients will notice and look for a different designer.

The more experience you gain, the more money you can charge. Most beginners charge about $20 to $30 per hour, so $25 is usually the perfect starting point for most people. However, you should move to per-project pricing as you become more experienced. 

You should use this time to build a strong design portfolio. Having more banner samples to choose from will help attract more clients.

The Project’s Scope

Next, you need to consider the scope of the project. Not every project will take the same amount of time to complete. You’ll want to make sure you get paid for your work, so complex banners such as video banners, should always cost more than simple ones.

Some projects require multiple meetings, tasks, and deliverables. If you expect you’ll have to put in a lot of time to finish the banner, then charge extra. You won’t need to do this if the banner is a simple, one-time task.

Make sure you consider the project’s scope, whether you charge hourly or per project. It’s best to be upfront with your client about the price so they aren’t surprised later.

The Project’s Value

Many new designers forget to consider the value of the project. Adding this factor into your pricing ensures you’re paid for your skills. If you suspect the banner will help the client make money, you’ll want to charge slightly more.

For example, you might charge more for a business advertisement banner than a social media banner. The business banner’s main goal is to attract customers, earning the brand more income. On the other hand, a social media design, such as a YouTube banner, is there to help someone gain a larger following.

This also includes any other services that you offer the client. For instance, you may include brand strategies together with the banner or adjustments to their website. You’ll want to charge a higher rate for the additional work.

Whether your clients come from small businesses or huge corporations, they’re ordering the digital banner because it means something to them. You want to charge a rate that’s fair to you, so don’t undersell your work’s value.

Examples of Online Banner Design
You might charge more for a YouTube Banner because a business can earn money from it.

Any Other Expenses

Finally, you don’t want to pay out of your pocket while making the design. Make sure you consider any other charges you’ll expect during the creation process. You probably have to pay for a subscription to the software you use to create the banner. Other expenses include access to stock images and your design equipment.

Plus, if you’re a freelancer, you need to cover your insurance costs. You should always factor those expenses into your hourly rate, so you know that you can afford everything you need.

Some projects do require more materials than others. These elements should fall under the project scope, although there will be instances when unexpected costs come up.

Hourly VS Fixed-Rate Pricing

Before you make the banner, you need to decide whether to charge per hour for your banner or have a preset rate. Most of the time, hourly rates are easier to figure out, and you get paid for all of your time.

However, hourly pay doesn’t consider the value of the project as much as fixed-rate pricing does. Because of this, many experienced designers charge per project. They also can complete the banner faster than new designers and still have it look outstanding.

Overall, you’ll want to choose the payment model you’re most comfortable with. It’s not uncommon for designers to switch between charging per hour and per project, depending on the scope of the banner.

This short YouTube video explains the differences between these two forms of pay and how to choose the one that suits you best:

Final Thoughts

To summarize, you’ll first want to decide if you’re going to charge hourly or a fixed rate. Think about how much time and effort the project will take—you will want to charge extra for complex or complicated projects. Lastly, you’ll also need to consider your experience.

As a designer, you can set your own prices. However, you’ll need to be careful not to under or overcharge your work. That way, you can keep clients for the long term without making sacrifices on your end. The more design work you do, the better feel you’ll get for setting your prices.

How Much To Spend on Marketing Design To Be Successful

If you have a business, you need to put enough money into marketing design. Otherwise, your company and website won’t grow. However, many people don’t realize how much they should budget for good design marketing.

You should spend between 7 and 8 percent of your gross revenue on marketing design if you want to succeed. Large businesses tend to spend more, around 10 percent, while most small businesses put forth around 8 percent. 

If you want to keep up with the competition, strive for those same ranges.

You’ll need to consider your company’s revenue and how long it’s been in business before building your digital marketing budget. I’ve covered everything in this article. 

So, read on to learn how much you need to spend on marketing design to have a successful business.

The Importance of a Good Marketing Design Budget

When you have a solid marketing design budget, you allow this section of your brand to thrive. You’ll then have access to better, more memorable designs for your site, which helps with conversions and returning users.

Plus, you can use graphic design to tell a visual story. Visitors can better understand your purpose and message after viewing images on your website.

Lastly, marketing design greatly influences whether you gain a new customer. You can have the best-written content ever, but if the layout and graphics on your site are bad, you still won’t get conversions. So, don’t hesitate to put more into your marketing budget.

Watch how you can create your own marketing design for a very low cost!

What Is Marketing Design?

It’s also important to understand exactly what marketing design is. Many people confuse it with other types of marketing, so you’ll want to have a good idea of what it is to create an appropriate budget for it.

Marketing design is a type of marketing that relies on graphic design elements to build strong marketing campaigns. It uses visuals to appeal to viewers and attract them to your brand. 

Suppose you have an appealing website with plenty of nice visuals and an easy-to-navigate screen. In that case, you’ll have a returning audience. We love seeing appealing website designs online- whether we realize it or not. Marketing design focuses on the visual aspects of marketing to create pleasing websites for brands.

Marketing design is very important, whether you run a small, local shop or a huge corporation. You should make sure your marketing design budget has ample funds to provide growth to the company.

Determining Your Marketing Budget

Your budget for marketing design will be unique to your business, so you don’t need to do what everyone else does to have success. Any budgets included in this article are suggestions, and you can choose an amount that you’re comfortable with. However, you’ll need to ensure you don’t put too little into your marketing design.

Setting up a clear marketing budget as a percentage of your revenue makes it much easier to determine what resources you need to put where. Many marketing experts recommend small businesses put seven to eight percent of their gross revenue into marketing. You can determine this by multiplying your revenue by that percentage.

Woman using calculator to determine marketing budget
Determine your marketing design budget before you spend money.

However, your monthly marketing budget should also include raising your SEO rank, online ads, and a stronger online presence. 

At a minimum, it’s best to spend $500 on marketing each month. Most small businesses can afford to fit this into their budget. It’s enough to afford access to good online design programs and plenty of other tools that you can use to build your brand.

It can sound like a lot, but providing a solid budget encourages your brand to grow. If you don’t put any money into your business’s marketing plans, you’re not getting much back out of it. So, even if $500 is more than seven to eight percent of your revenue, it’s still good to put at least that much into your marketing campaign.

Your budget should grow naturally with the rest of your business. When you notice your gross revenue increases, you should also throw more into your marketing design budget. These two feed off each other, so you’ll keep getting good results.

You can always put a slightly higher percentage of your revenue into marketing design if you have the room. In doing so, your business and online presence will grow much faster. You can do this for campaigns, then lower the budget back to your normal amount when it’s done.

Overall, make sure you base your marketing design budget on a portion of your gross revenue. That way, you won’t lose your other important budgets, and you can determine where your money needs to go first.

Marketing works, so you won’t want to ignore it. If you do, you’re sure to lose to your competitors.

Computer monitor showing Graphics Creator Software
The Graphics Creator: Create marketing graphics on your own without hiring a graphic designer!

How Design Costs Break Down

When you’re deciding on how much to spend on marketing design, it’s a good idea to know where your design budget goes. Several options, including logo design, photography, and video creation are available to you. These designs can be very pricey, especially when you have expert designers make them for you.

However, don’t let that discourage you. Think of it as an investment- the better quality design you have, the more money your brand makes.

Here’s how some of those marketing design costs can break down:

  • $15 to $35 an hour for a freelance designer.
  • Between $100 and $850 for a logo.
  • $20 to $150 for a custom social media graphic.
  • $5,000 or more for a high-quality website with multiple pages.

As you can see, the costs can add up quickly. Without a budget in place, you could spend way more than your brand can afford at the moment. More experienced designers can cost even more than that.

If you’re a small business and need to save money on your marketing design budget, you can try using software like the Online Graphics Creator. It’s an affordable tool that you can use to make design elements yourself, so you don’t have to worry about hiring professional designers.

Block of wood with words "spend less money"
Use easy online graphics software and save a ton of money for your small business.

Breaking Up Your Marketing Design Budget

You’ll want to use the 70-20-10 rule within your marketing design budget. This means: 

  • 70% of your budget goes towards marketing strategies you know will work well. 
  • 20% of your budget goes into new strategies and growth.
  • 10% of your budget goes into experimental marketing strategies.

Using this rule, you can further split your marketing design budget. Focus on design content creation that you know works, and your business is sure to grow. As it does, you can put more money into experimental strategies and see what works best for you.

Overall, you can treat your marketing design budget just like any other budget your business has. Even though it’s for creative content, you still want to know if it’ll be effective.

Final Thoughts

To summarize, you can put between seven and ten percent of your gross revenue towards your marketing design. Many small businesses put a slightly smaller percentage towards their marketing design than large corporations.

If you can afford to put more money into your marketing design, make sure you do! You’ll help your business grow and build a larger audience faster, as the advertising will give you more exposure.

How to Design Eye-Catching Ads for Your Target Audience

0

You have a product or service to offer and want to make an attention-getting advertisement. But how do you decide what kind of ad to make? What image should you put on your ad? What colors and fonts should you use to really grab attention?

The truth is… you’ll never know unless you’re sure about who you want your ad to speak to. That starts with finding out who your target audience is. Once you do this, creating an ad and making sales from it will be easier and faster.

Here’s how to design eye-catching ads for your target audience step by step:

  1. Define Your Customer
  2. Identify Their Problem or Concern
  3. Give the Right Message
  4. Create Eye-Catching Advertisements

Continue reading and following these four simple steps to create perfect ads for your target audience.

Watch this video to see how to design a targeted ad using The Ad Creator templates from The Graphics Creator.

1. Clearly Define Your Customer

You must understand who your customers are in order to create ads specifically for them. The goal here is to find out who is the person who will buy your product without hesitation.

Answer These Questions About Your Target Audience:

  1. How old are they?
  2. Are they male or female?
  3. Do they have children?
  4. Are they married or divorced?
  5. How much money do they make?
  6. How much education do they have?
  7. What’s their occupation?
  8. Where do they live?

You might also benefit by understanding their personal/professional interests and needs. What communities (online and offline) do they hang out in? Is there a common theme with other members of this community? Are they all over age 40 and divorced? All parents with teen children?

Finally, create an “avatar” of that customer (an image of this person in your mind or on paper). You can actually create a visual and stick it on the wall so that this person is easy to keep in mind.

Chalkboard with words "Who is your audience"
You need to define your target audience BEFORE crafting your advertising message.

2. Identify Their Problem

Now that you’ve identified who your customer is, what kind of problem do they have that you can solve? If you’ve identified your customer correctly, these people will be happy to “pay” you to solve their problem.

Therefore, your success with advertising depends on correctly identifying their problem, frustration, or pain. But no worries, you can do this by answering these questions:

  • What are their specific problems, frustrations, or pains? Be specific.
  • Can my product or service solve these problems?
  • What are one or two reasons this customer would “object” to purchasing my product or service (even though it will solve their problem)?
  • How will I overcome these objections? What will I tell them or show them that’ll squash those objections?

Here’s a Laughingbird Software example of an audience objection:

A common objection to using Laughingbird Software’s Graphics Creator is… “I don’t know anything about design, so I can’t create my own graphics!”

In response to the objection above about not having any design experience, I’d say… “You can create professional-looking graphics for ads, social media, etc., WITHOUT any design experience, using ready-made templates and easy drag-and-drop images”.

stressed female in front of laptop
Solve your potential customers’ primary problem or frustration with your product or service.

3. What Message Do You Want to Give Your Customer?

Now that you know who your target audience is, it’s time to be clear on who you are and what you have to offer. Although you’ll do this with the eye-catching design you’re going to create, you can also grab their attention using your words. Graphic design and marketing are different, even though they can both be used to grab attention.

To help you decide what to say, try this exercise. State EXACTLY what you offer, who you will help, and what problem your product or service will solve. Fill in the blank (remember this from your school days?):

I help ___________________ do/achieve/get/learn _______________ so they can _______________ without _________________.

Take a look at the Ad Creator Templates and use the coupon code below in your shopping cart to purchase:

Blue and green graphic showing discount code ADCREATOR10
How to Design Eye-Catching Ads for Your Target Audience

Examples of the Perfect Message for Your Target Audience

Here’s my own example of how to craft the best message for your audience:

I help small, online business owners create their own graphics so they can quickly market their products or service without spending a lot of money or waiting for someone else to do it.

And, here are a couple more examples for various businesses:

I help middle-aged, professional women, get rid of age spots so that they can look great and feel confident without waiting months for a creme to work or getting laser surgery.

I help online solopreneurs create effective business plans so they can easily grow their businesses without feeling overwhelmed and financially drained.

Got it?! Now, translate your “me” statement into a “you” statement.

My example:

Small, online business owners… create your own graphics so you can quickly market your product or service without spending a lot of money or waiting for someone else to do it.

That’s it! Your audience has been targeted and you’ve got the information you need to design your ad.

4. How to Design Eye-Catching Ads for Your Customers

Ad design with woman sitting in field of orange flowers.
Design an ad like this one: Add your message, select the best image, and you’re ready to advertise!

Now that you know who your customers are, understand their problems, and are ready with your offer, create a visual ad with a message geared toward helping them!

This is easy if you use a design tool with pre-designed templates. Make sure to watch this quick tutorial video to see how quickly you can design the best advertisement.

If you don’t already have The Graphics Creator, grab the downloadable Ad Creator templates here (BONUS: get The Graphics Creator 8 software for FREE… Don’t forget to use the coupon code ADCREATOR10 for $10 off!

The Creatorpreneurs Academy brings together strategic marketing with eye-catching design so you have the tools and skills to grow your business fast.

Final Thoughts

Learn how to design eye-catching ads for your target audience by following the four steps in this article. By following these steps, you’ll be sure to create an ad that solves potential customers’ problems. In turn, they’ll be willing to buy your product or service because it is just what they need!


12 Best Tools To Create Digital Art for Non Artists

Do you feel like putting together professional artwork for your company, website, or social media page but feel put off? You might think you need to develop software and art creation skills for several months before you can finally pull off great digital art, but this is no longer the case.

Here are 12 of the best tools to create digital art for non-artists:

  1. Graphics Creator
  2. Visme
  3. Design Wizard
  4. Vista Create
  5. Easil
  6. Snappa
  7. Stencil
  8. PicMonkey
  9. Canva
  10. PlaceIt
  11. Wepik
  12. Desygner

In this article, I’ll further explain what makes each of these digital art tools an excellent choice even for the non-artist. Therefore, if you’re looking to create professional-looking artwork with little to no previous experience, make sure to keep reading.

1. Graphics Creator

Examples of graphics in the Graphics Creator by Laughingbird Software
Non-Artists can easily create digital art using the Laughingbird Software Graphics Creator!

Laughingbird Software’s Graphics Creator is a tool that lets non-artists create eye-catching visuals for any purpose. Whether this is for social media marketing or logos, you can help your small business grow with this fun, easy software tool that anyone can use.

The Graphics Creator has a massive selection of templates, images, and tools for marketing and design. All you need to do is open the Graphics Creator online and choose between the seemingly endless array of creative, tailored templates for various functions, with an editor that allows all of the template designs to be customized.

The templates are all custom-designed to grab viewers’ attention. All you have to do is add your touch using the drag-and-drop design elements.

Screenshot of the Marketing and Advertising Design Templates in the Graphics Creator
The Graphics Creator Digital Art Creator includes Marketing and Advertising Design Templates for Non-Designers.

It’s suitable for complete beginners, and if the intuitive software is still daunting, there is a whole range of tutorials and helpful videos on hand to guide you through the process of producing artwork that will bring you more customers.

There are two models to the software, online and downloadable, so you can choose to use it either on or offline. The online version provides a convenient way to immediately access all of the templates by subscription, starting at under $6 per month on the annual plan.

The design templates can also be purchased separately and come with the Graphics Creator free download. The downloadable software proves to be super helpful if you have a poor internet connection or want to always have access to the software on your computer or laptop even if no wifi is accessible.

2. Visme

Visme specializes in tools for creating infographics, presentations, and graphics. It’s excellent for businesses as you can save company branding information for future use. It’s straightforward for beginning designers with an intuitive drag-and-drop format, meaning you can simply insert and move elements around.

It’s suited to a professional office environment where there is a need for unified branding, sharing with many other people, and collaborating, so this isn’t a useful tool for individual, creative projects.

However, this tool is more expensive than many other platforms, with the business member service starting at $49 per month. Starting at $25 per month, the basic and personal memberships have fewer functions than the business level, so you should consider this when purchasing.

Overall, this software may be better value for larger organizations but not individual creators or small teams.

3. Design Wizard

Design Wizard Art Tool

Design Wizard is great for non-designers who want to make short videos and simple graphics for blogs and posters. There’s no need for design skills as it focuses on speed and ease of use with many templates for social media, graphics, and more.

There’s a free version of the app, but this will place a watermark on any graphic produced, making it unsuitable for business use or those who want to create clean images. The Pro membership starts at $9.99 per month and allows access to 60 design templates per month.

Overall, it sacrifices the wide variety of functions found in other tools for speed and usability but is helpful for businesses who want to appear professional in their graphics for products like business cards or marketing campaigns.

4. Vista Create

Vista Create, formally known as Crello, is a robust tool that is used primarily to create graphics for branding and advertisements and works well with social media.

It has an extensive library of images and templates to choose from, just like the other types of software mentioned until now. It also provides many templates for animations, but there is limited potential to edit these.

Pricing starts at just over $10 per month for the Pro version of this software. Still, there is a free version that includes almost all of the features that the paid subscription provides, with the main difference being the amount of storage included and a few extra tools such as a sticker maker. Overall, this tool would suit advertisers and branders who need a professional graphics library.

5. Easil

Sample design in Easil
Easil for non-designers

Easil is a software that provides several templates for different social media sites. It’s a source of many creative and stylish outlines for Instagram and allows you to create graphics for Instagram stories. An exciting feature of this software is its hospitality tool focused on businesses such as tourism companies and restaurants that need to create branded menus or other displays.

It also provides many ways to edit and customize images, texts, and features, create GIFs, and more. It’s a strong tool for people who want to quickly create graphics for certain functions and advertising on social media.

Despite the stylish appearance and focus on minimal-looking graphics, this software is easy to use with a drag-and-drop function for creating images. It’s also very simple to pick a unified color scheme using the design tool.

Easil design costs start at $7.50 per month for the Plus membership. Still, a free version also allows access to the images and templates but not to the variety of design functions such as text editing that makes the graphics on Easil so stylish.

6. Snappa

Snappa is an image editing tool designed for beginners to create graphics and artwork. One of its key features is its picture editor, which allows users to add effects such as background graphics and speech bubbles, usually achieved using software such as Photoshop but at a fraction of the time and price.

Another impressive feature is that it gives you the ability to collaborate with others on projects and use many images and templates for different graphic types. It’s most similar to Canva or Visme but with a more advanced photo manipulation software.

This tool is focused on social media campaigns, so if your goal is to create custom art for many sites, including Facebook and Instagram, this may be the software for you. The tool is entirely online, so there’s no need to download extra files.

Pricing starts at $10 per month for the Pro version, and although there’s a free version too, please note that this does not include the advanced picture editing functions which add value to Snappa.

7. Stencil

Stencil is a tool built with simplicity in mind. It’s excellent for those who need to make a simple graphic composed of text over image very quickly; however, it is limited in other functions. This tool is most similar to Easil, but takes the concept further, with all procedures included on one page and a minimal range of design tools.

They have also included a social media scheduler so that artwork created in Stencil can be lined up to be sent out at a specific date and time, making life easier for content makers. This focus makes it less suitable for more complex tasks, such as branding or graphics for printed design.

Stencil is priced starting at $9 per month for the Pro membership. However, even the free Basic version is useful for basic functions (as the name suggests) but allows limited access to stock images and templates.

This tool is for those who want to create digital art as fast as possible and don’t need to spend too long thinking about specific design styles. It would work well for people who have a simple, stylish idea in mind for an Instagram story campaign or something similar.

8. PicMonkey

Sample of Picmonkey Digital Designs


Picmonkey Digital Designs can be created by non-artists.

PicMonkey has a very broad set of functions, templates, and tools to make a virtually endless number of graphics, and it even has a photo retoucher, similar to the one found in Adobe Photoshop. As well as the common model of selecting and editing templates, this means that you can customize images artistically without having to invest in more expensive software.

This retoucher is one of PicMonkey’s unique features and allows beginners to create beautiful images by adding filters and effects. Although editing images in this way may seem intimidating for non-artists, the walk-through guides and intuitive layout will take you through the process and let you get started quickly.

Pricing with PicMonkey starts at just over $11 per month and includes all of the aforementioned features. However, this tool has no free version, so be prepared to pay for the software after an initial seven-day free trial. Although it may seem complicated, this software has made the art of quality image editing feel very accessible.

9. Canva

Canva is a tool for non-artists to collaborate on a huge variety of online and printable graphics. You can work with teammates by creating joint projects and allowing them to make edits. You can also link to other apps such as Google Drive and Dropbox for seamless file sharing.

It’s also a simple design format that makes it easy for non-creatives to use and allows you to work on many designs, from social media to presentations to videos. Like many other tools, it has a broad selection of templates and stock images and is helpful for business branding.

As well as online graphics, Canva can be used for printed material to match your online branding on t-shirts and mugs.

Canva is priced at $11.99 per month for the Pro membership; however, the software also comes in a free version that allows access to a considerable amount of templates and graphics and includes the collaborative tools featured above. If you’re looking to work in a team and don’t have a background in art and design but want to create great graphics, this is a very functional and wide-reaching tool.

10. PlaceIt

Sample of Placeit Design Templates


Placeit Design Templates

PlaceIt is a colorful tool for mock-ups, marketing, and logos. You can easily and quickly draw up graphics for use for your business purposes, and its strength is its usefulness for companies and merchants. However, there are limited options for editing and being more creative, but this makes it very user-friendly, with less to confuse or intimidate new users.

There are many options for displaying designs on printed materials such as prints and apparel. There are also options to produce graphics for sites such as YouTube and Twitch using templates for these formats.

PlaceIt subscription starts at $7.47 per month for unlimited access and is worth the investment if you are a creative entrepreneur who needs help with your product design. However, it may not be great for varied, creative kinds of work.

11. Wepik

Wepik is different from other tools as it’s free to use. As you would expect, this means it’s much more limited in terms of functions, consisting of a library of templates with basic editing tools, but this means that if you need to create something without having to invest in a subscription to a service, this is the software for you.

You can use the templates for social media graphics, printed materials, and even things like résumés. It is ideal for non-commercial uses. If you need to quickly create a good-looking image for a project or social media post, this might be your site.

12. Desygner

Desygner Digital Art Tool example


Desygner Digital Art Tool

Desygner is another tool similar to Canva and Visme, with valuable features like a background remover for images and a PDF editor. It’s easy to use and accessed directly through your browser, minimizing the need for separate downloads.

Those who would benefit most from this tool would be online marketers and social media managers, as the templates and artwork created here are ideal for use in ad campaigns such as those using Google ads. It’s designed to be easy to start working on, allowing you to grab a template and start editing.

Pricing begins at $4.95 per month for the Pro version of this software. Still, there’s a free version with many templates and some tools, making this alternative ideal for smaller businesses and beginners who want to start making graphics before committing to a subscription.

How Much Should I Charge To Design Facebook Graphics?

Hiring someone to take care of any facet of your business can be challenging, but one of the most critical areas of any company is its business and social media design. This is where you come in. But how much should you charge to design Facebook graphics for your clients? 

The average hourly rate for a graphic designer working on a Facebook account can range from $25 to over $200 an hour based on experience and scope. Factors include experience, location, nature of the work, and your goals for the future. 

This article will explain what factors should determine the price you will charge prospective clients and how you should approach setting a price with your client.

How to Set a Price for Facebook Graphics

When you decide on the price that you’ll charge a prospective client, there are several factors to keep in mind.

Consider Your Experience

First of all, take a look at your trajectory as a graphic designer. Are you just starting or do you have some experience under your belt? Depending on this, you could end up with very different prices.

For example, a beginner that is still building a portfolio of Facebook designs and other social media graphics may charge only $5-10 per post, but an experienced designer can charge as much as $45-50 per post.

If you have some experience but don’t consider yourself an expert yet, you use as a reference the mean U.S. wage for graphic designers: $28.83 per hour.

You should also consider your experience in the client’s niche. For instance, if you specialize in creating social media graphics for a certain industry, you’ll be able to position yourself as an expert and charge higher rates.

woman with increasing line chart behind her
The more experienced you are, the more money you can charge as a social media designer

Do You Expect Ongoing Work?

Ask yourself whether you anticipate having ongoing work with this client. If you want to build a long-term relationship with a client and get a spot on upcoming projects, you’ll want to establish a competitive price and stick to it. It may be a good idea to offer discounts for large graphic packages.

Set a Competitive Price, but Don’t Go Too Low

While it may be tempting to charge less with the hope of getting more clients, this is not always a smart decision. Pricing yourself on the low end of the spectrum can make you less attractive to potential clients. Have confidence in your abilities and skills and make sure you’re charging a price that will make you profit, not simply cover the costs of doing the work.

Are You a Freelancer or Part of an Agency?

Another important factor for determining how much to charge to design Facebook graphics is whether you’re working for a company full-time or freelancing. Clients usually don’t pay benefits, retirement plans, vacations, or healthcare for many freelance employees, and this is something that must be factored in when determining a price range.

Consider the Client’s Budget

Of course, if the client doesn’t have money to pay for your work, then there’s no point in negotiating. It’s okay to be flexible—your rates don’t have to be set in stone and can be negotiated.

However, that doesn’t mean you have to accept every condition. It’s also okay to lose clients. The idea here is to find a balance between flexibility and willingness to lose contracts.

hands on a tablet with social media symbols on desk
Designing Facebook graphics can be complicated. First, you need to know what your client is expecting!

How Complicated Is Designing Facebook Graphics?

When designing Facebook graphics for businesses, you’ll meet clients with very different needs. Before determining a price, it’s crucial that you ask yourself how complicated is the work at hand.

Facebook graphics for businesses can range wildly in difficulty and scope. When reaching an agreement on pricing for a client, you must first determine the exact amount of work they need and how much you’ll need to do. 

Before agreeing on a price with a client, determine a few things to provide the best value for yourself and the prospective employer. Consider the following:

  • The number of pages that require graphics. Some Facebook accounts may span numerous pages, so knowing how many pages will need graphics before agreeing on the work is essential. 
  • The type of Facebook graphics they need. For example, do they need Facebook cover photos or daily posts?
  • The level of detail that they want in the design. Are you creating a brand logo or just fixing an existing graphic? Do you need to compose several images for a single post, or are they just text posts with a basic background? These details will affect the amount of time you’ll need to spend on a project. 
  • Do they intend to have new graphics on an ongoing basis? You will want to know upfront if it is a one-time project or if they want several graphics over a period of time. 
Laughingbird Software Facebook Profile graphic
How to make a Facebook Graphic (using The Graphics Creator)

Designing Facebook Graphics Yourself

Perhaps you’re a business owner trying to understand the way graphic designers charge for their work. If that’s the case, you should know that hiring a designer isn’t the only option you have.

With the right tools, you can design professional-looking Facebook graphics by yourself! What you need is an easy-to-use, all-in-one design software, and there’s no better choice than The Graphics Creator. It offers over 6,500 graphic elements and templates that can be used by anyone, even if you don’t have any design skills.

How Location Influences Pricing for Facebook Graphics

Another important factor for how much you should charge to design Facebook graphics is where you live and where your client is based. According to the U.S. Bureau of Labor Statistics, some of the highest annual wages for graphic designers in 2021 were in these states: 

  • California 
  • New York 
  • Washington D.C. 
  • Rhode Island 

Take this into consideration when discussing a price with a potential employer. If you live in one of those states or are headquartered there, you’ll have some bargaining power. 

Final Thoughts

When discussing rates to charge a potential client for their Facebook graphics, you need to set an approximate value for your work. You can do this by considering: 

  • Your experience 
  • The exact nature of the job 
  • Your relationship with the client 
  • Your location 

Keep all of these things in mind, and you will be on your way to deciding on a fair price for you and your clients.

The Difference Between GIF, PNG, and JPEG Images (a Comparison)

The three most common image formats you’ll see online include GIF, PNG, and JPEG (or JPG) files. If you’re working on a design or image to upload to a website, you’ll need to know what file type to use. However, you need to know the differences between these files so you can choose the one that best suits the circumstances.

The difference between GIF, PNG, and JPEG is the image’s main purpose. GIFs are for animated images, PNGs are for lossless compressed images, and JPEGs are best for photographs. GIFs and JPEGs have small file sizes, while PNGs are larger.

If you’re creating digital graphics, you’ll need to know how to save them properly. Otherwise, you could lose image quality or create a file that is too big for your device to handle easily. This article contains all the information you’ll need to easily compare these image file types.

Differences Between GIF, PNG, and JPEG

All three of these file types support images that can be saved and shared to showcase your work. However, each file works best in different situations. You’ll want to know what format to save your work in as you create your designs.

GIF Image Files

GIF (Graphics Interchange Format) files are raster images you can animate. They work by combining multiple images in a sequence and displaying them to create the illusion of movement. GIFs are usually short and looped, so they never stop replaying. You can think of them as digital flipbooks.

These files are also popular for displaying static graphics, although they can only use a limited number of colors.

Overall, you’ll encounter GIFs on various websites– usually social media platforms. People use them to send memes or reactions to each other.

Colored smoke graphic template in Graphics Creator
Use the GIF RECORD Menu in The Graphics Creator to create an animated GIF

Pros

  • Have tiny file sizes.
  • Load quickly.
  • Use lossless compression, which limits the decline in image quality.

Cons

  • Only support 256 colors.
  • Can be difficult to edit.
  • Slow internet connections impact their quality.
  • Can appear blurry if you use photos.

PNG Image Files

PNGs (Portable Network Graphics) came about to replace GIFs. They present a single, high-quality image through lossless compression. However, they offer a much broader color palette than GIFs, so you’re not as limited.

These image files are the most popular with designers because they support transparent backgrounds. This feature makes them useful for logos, graphs, and banners. Since transparent PNGs don’t use a background, it’s easy to add them to websites without having to match the background to other colors on the site.

Plus, since they’re transparent images, they can easily be placed in front of or behind other images. For example, you can take a PNG image of a car and drop it in front of a picture of a house. Or place a transparent png person over a sales graphic as seen here:

Woman over background graphic
Here’s a transparent PNG image of a person dropped over a background design.

Of course, PNGs can also have backgrounds. These backgrounds can be removed (see below).

PNGs are most known for using lossless compression, which allows the image to keep all of its data even when you compress it. That means you can create very detailed images without losing image quality.

Pros

Cons

  • Can have large file sizes.
  • Don’t support CMYK color.

How to Make a PNG Transparent

If you have a PNG file image that isn’t transparent but want to remove the background, you can. For instance, perhaps you’d like to remove your business logo from a background so that you can place your newly transparent logo on any image. 

Read how to make a PNG transparent with The Graphics Creator.

Find out more about png advantages and disadvantages!

JPEG Image Files

JPEGs (Joint Photographic Experts Group) have been the standard image format since the 90s. It’s best for digital images and is most widely used among photographers. This file type uses 24-bit color and lossy compression, making it easier to store and share images.

Due to how a JPEG compresses, it can display 16.8 million colors without having large file sizes. This feature makes it very attractive to photographers and web designers. These pros use JPEGs online since most browsers can open them quickly without sacrificing much detail.

Overall, JPEGs are the most common format that you’ll find online. They’re compatible with most browsers, and their small file size allows quick online access.

Design saying "Comment Below"
Download a Graphics Creator design as a PNG or JPEG!

Pros

  • Most widely recognized image file format.
  • Small file sizes for upload and viewing.
  • Uses lossy compression.
  • Best for photography.

Cons

  • May compress the images too much, causing quality loss.
  • Can lose pixel data, causing noise (or pixelation).

How To Choose Between GIF, PNG, and JPEG

After working on an image, you want to ensure that you save it using the proper file format. That way, you won’t have to worry about the image losing quality. GIF, JPEG, and PNG are all common options, but you must always choose the right one.

This chart will help you understand when to use what image file format for the best results:

File FormatIntended UseUsage ExamplesWhen To Avoid
GIFSmall image files with animationWebsite buttons, advertisements, and animated graphicsDetailed images or photography
PNGGraphic design, transparency, to keep quality in smaller imagesLogos, banners, charts, infographics, screenshots, and designsPosting high-quality photography online
JPEGPosting high-quality photography onlineUploading photos to social media, blocks, and other websitesPrinted media or creating graphics

You want your images to have as much quality as possible when you share them online. Choosing the right image file format is essential if you have a brand and want to make sure everything looks nice. Plus, you always want the image to load correctly for viewers, so ensuring that your file type can maintain the integrity of your image is essential.

Practicing saving your work as the correct image file is always a good idea. Even if you’re not saving the final product, you should get used to always using the appropriate file type. That way, you won’t have to make changes later on that could cause the image to lose quality. If the quality drops too much, you may have to recreate the image if you don’t have a backup of the original!

Template inside The Graphics Creator showing download formats
The Graphics Creator lets you export designs in PNG, transparent PNG, or JPEG format.

The differences in these file formats make each of them better suited for certain types of images. Here’s when you should use them:

Using GIFs

GIFs are the smallest of these three image file formats. They’re perfect for creating small or animated graphics. For instance, they work great when making animated banners and buttons. Today, they’re most commonly used in reaction GIFs on social media or advertising.

You’ll want to choose to save your work as a GIF if it’s fairly simple and has some animation. Since this format uses intense compression, the image quality can drop, but it should load very fast for others online.

You can use GIFs in simple web graphics or for online animation. These two features give them plenty of uses. However, you should avoid them when you need to print or want a photo to have a very high resolution. 

Motion Graphic Template
Use the pre-designed animated elements and templates in The Graphics Creator.

Using PNGs

PNGs are best for when you want to save the image’s original quality. They’re very common online, and all major browsers support them. 

If you’re a graphic designer, you’ll work with PNGs the most out of these three formats. Since PNGs are best for logos, charts, and other small graphics, designers often use them to create content for web pages.

You’ll want to use PNGs for the same purposes. However, you should avoid them when you don’t want the file to take up a lot of space as PNGs can be very large. So, if using them on your website, make sure you’re using the smallest image size possible.

You also shouldn’t use them for high-quality photographs.

Using JPEGs

JPEGs load fast, so you can use them to send very detailed images quickly. Plus, it’s the most popular image first online, so you’ll find many JPEG images there. It also supports a broad spectrum of colors and has plenty of uses.

You can use JPEGs to post images for social media or blogs, create product images, and document photography or artwork.

However, since these files are small, they do lose some quality. When you compress the image, you also lose any transparency in the background, so JPEGs are not suitable for many design projects. 

Compression also “flattens” the image, removing any layers and making it much harder to edit later. So, if you plan on changing the image later, you’ll want to save one copy as a JPEG and another as a file that still has the layers (such as a Photoshop file). Or you can follow the video below (you don’t need Photoshop).

In Graphics Creator, you can use “Save As” to convert images from one file format to another. Watch this video for details!

Converting Between These Image Formats

You’ll often need to convert images between different file formats to get the one you want. You can easily convert a PNG to a JPEG by opening it in your design software, then selecting “Save As JPEG.” Plus, you can export JPEGs as PNGs to save them in that format.

It’s a little more complicated when GIFs are involved. Since they use multiple images to create an animation, they won’t transition as smoothly to PNGs or JPEGs. Although, it’s usually easier to make the GIF into a JPEG than to make the GIF into a PNG.

Some types of design software make converting your image files easier than others. Overall, it’s better to save your images in the correct format from the start so you don’t lose any original quality when converting them between different file types.

Conclusion

To summarize, GIFs, PNGs, and JPEGs are all very different from one another. You’ll need to make sure you always save your work in the right format to get the best results from them. GIFs are best for animations, PNGs are best for graphics, and JPEGs are best for sharing photographs. 

Overall, you’ll want to familiarize yourself with these three image formats. They’re very common online, so you’ll run into them daily. Whether you use them professionally or personally, understanding image formats can help you keep your work in good condition.

How Much Does It Cost To Create Graphics for Video?

Graphics are an increasingly important component of marketing videos today. But, while motion graphics can strongly enhance the effectiveness of your communications, they can also be complex and tiresome to execute. Moreover, there’s much confusion about how much it costs to create graphics for video.

The cost of creating graphics for video varies from $1,000 to $5,000 per finished minute for most practical purposes. The final cost will depend on various factors, including the duration and complexity of the project and the quality and extent of the creative input required to execute it.

This article will look into the factors that affect the pricing of graphics for video and suggest ways that you can minimize the cost of your next motion graphics project.

Factors That Affect the Cost of Motion Graphics

Motion graphics are animations of graphic elements–like line, color, text, and illustrations–that enhance the communicative content of a video or animation project. They can be as simple as a few characters of text on a plain background or as dynamic as the title sequence of the latest blockbuster movie.

The great variety of content that falls under the category of graphics means that the cost of producing motion graphics for video can vary just as dramatically. Primarily, their cost will be decided by the scope of the project and its budget. So, graphics for the social media page of a small business will cost much less than branding for a large corporate client.

Examples of graphics in the Graphics Creator by Laughingbird Software
Laughingbird Software’s Graphics Creator- Create your own graphics and motion designs!

The factors that will determine the cost of graphics for your next video project are:

  • Duration
  • Complexity
  • Creative Input

Let’s take a look at each of these.

Duration

The duration of the motion graphics sequence or sequences you need will significantly impact their pricing. An extended motion graphics sequence or multiple sequences will involve more work than a shorter or single sequence.

For instance, if each frame of your graphics project is individually created, a two-minute sequence will literally involve twice the work of a one-minute sequence. Inevitably, your two-minute graphic sequence will cost you more than a one-minute graphic sequence would have cost you.

More often, motion graphics artists will use keyframes to reduce their workload. This way, they can create longer sequences of motion graphics without individually creating each frame. However, longer graphic sequences will still require more work and cost you more.

Remember that motion graphics can involve teams of professionals with different skill sets. So, longer sequences may also require hiring more talent and involve greater coordination and planning, further driving up the price of your project.

Finally, longer projects may also demand more revisions to get to completion. More revisions will increase the time taken to complete the project and add to its cost.

Complexity

As mentioned earlier, motion graphics projects can vary greatly in scope and complexity. The more complex the project–and the greater its scope and visibility–the more expensive it is likely to be.

The most complicated motion graphics projects will require you to hire large teams. They may weave together multiple styles of animation, illustration, or design and involve other specialists, such as sound designers and video editors.

The most sophisticated motion graphics projects can use a combination of:

  • Graphic design.
  • Illustration.
  • 2D animation.
  • 3D animation.
  • Rotoscopy or other specialized animation techniques.
  • Photography.
  • Video.
  • Sound recording, design, and editing.
  • Music.
  • Photo and video editing.

Of course, the cost of motion graphics will also be significantly impacted by the quality of the animation and the degree of customization it involves. Design and animation elements that are more detailed will involve considerably more work and may require greater skill and experience.

Some projects may involve working with already available footage, photographs, or design elements. Others might require every element to be designed or customized, down to the individual fonts used. Inevitably, more detailed projects will cost more than simpler ones.

Often, the simplest motion graphics projects are executed by a single individual and will, thus, cost less. On the other hand, the experience and infrastructure needed to execute complex projects mean that you may have to hire a reputable design firm. These firms will cost you more.

The relationship between the complexity of a motion graphics project and its cost explains why an animated gif for a social media post is likely to be much less expensive to sanction than the title sequence for a multi-million dollar motion picture.

How a font is selected in Graphics Creator Software
Choose a Google Font for the text to go on your Graphics Creator motion graphic!

Creative Input

Another significant factor in the price of motion graphics is the degree and quality of creative ideation required.

You could oversee the entire project yourself, as long as you have a clear plan for its execution and can either execute it yourself or find an individual or a team to manage it for you. In this case, your project will cost less than a project requiring a creative team to develop a creative plan.

On the other hand, if you need to hire an experienced, in-demand creative professional or team to conceptualize and coordinate your motion graphics project, it’s likely to be more expensive.

How Can I Save on My Motion Graphics Cost?

Motion graphics effectively aid in clarifying communications and can help better articulate the intentions behind your communication. So, the many variables involved in developing motion graphics for video shouldn’t put you off the idea of using them in your video project.

The market for video and animation services is deep enough to offer a wide range of solutions for individuals and businesses at various price points. Advances in digital technology, cheaper computing power, and numerous skill-development programs have also lowered the cost of developing motion graphics for the most affordable end of the market in recent years.

You can save on your motion graphics needs by hiring emerging designers, doing as much as you can on your own, aiming for maximum simplicity of your project, and using stock libraries. 

Whether you’re an accomplished media professional or a small-business owner with no communications experience, there’s no reason you need to spend beyond your budget when commissioning your motion graphics project. With a little bit of research, planning, and foresight, you can find a solution that works for your specific needs.

The following sections will outline a few practical solutions for keeping the cost of your motion graphics project under budget. Although every suggestion here may not apply to your particular project, they may still assist you in thinking about various approaches to your project.

Hire a Less Experienced Professional

Your graphics project may be simple enough for one individual to execute. In that case, the most significant cost-reduction measure you can take is to hire a less experienced professional for the job.

More experienced and in-demand design professionals tend to charge premium rates for the advanced skills they bring to the table. On the other hand, you can find graphic artists for as little as $18-35 per hour. And college students might work for even less to build a professional portfolio.

However, remember that you’ll get what you pay for. Often what looks cheap on paper ends up costing more because of reworking or ends up producing an unsatisfactory result. So, always make sure to thoroughly vet your candidates and try not to go for the absolute cheapest option.

Still, an inexperienced graphic artist may not be a bad one. Before hiring a motion graphics artist, look at several artists’ portfolios. This way, you can find an artist whose style you like or who has experience executing work in a similar style, even if it’s only on a college assignment.

Consider that the communication skills of the graphic artist you hire are as crucial for the success of your project as their professionalism, reliability, and hourly rate. You must also be clear in communicating your requirements to the artist, especially if they’re less experienced.

Finally, the quality of your motion graphics should match the production values of the video they are accompanying. So, if you’re making motion graphics for a more polished video product, you will want to ensure that the graphics overlaid on it are of a similarly sophisticated finish.

Create your own motion graphic using professional Cinemagraphs. Use it as a background in graphic design software and add text or other elements!

Do As Much as You Can Yourself

If you’re not a design professional and don’t have any experience in or inclination for visual design, you may have to hire a design professional to create the motion graphics for your video. Despite this, there may be several aspects of a motion graphics project you can contribute to or complete yourself.

How to Contribute to the Project

You could develop the concept for the video, write any text required, or provide assets you own, such as a logo or other previously sanctioned brand identity, privileged information, older videos, client testimonials, etc. All of these can lower the cost of making motion graphics for video.

As mentioned in the earlier section, effective communication on your part can also help the graphic artist or team work faster and more efficiently, saving you time and money on a motion graphics project.

Create Your Own Video Graphics

Finally, if you’re a little more computer savvy and adventurous and have plenty of time on your hands, you’d learn one of the many free or affordably priced motion graphics applications available today, such as Adobe After Effects.

Several of the newer motion graphics software also come with readymade templates and complementary libraries of digital assets that make them very easy and affordable to use. Using these products, even a non-specialist can create motion graphics, as long as you have reasonable expectations for the outcome.

Template Sets and Graphic Elements
Select from Motion Graphics Templates in the Graphics Creator.

Create Your Own Motion Graphics for Social Media and Advertising

If your goal is to stand out in a crowd of social media posts and ads, then you can use a much more simple tool to create your own motion graphics. This involves using graphic design templates and adding motion graphics backgrounds as well as other design elements.

The Graphics Creator is simple and intuitive, allowing you to select a template, pop in an animated background (use the ones included or import your own), add text and/or other elements, and export it. You can then create it as a .mp4, etc. in just a couple of minutes using the free software Handbrake.

Aim for Maximum Simplicity

As has already been mentioned, simpler motion graphics projects can be significantly less expensive to produce than more complicated ones.

Complex graphics may require you to hire multiple specialists. Apart from designers and animators, your project may require photo, video, and sound artists, as well as greater creative input and more coordination. All of these will inflate the price of your project.

And larger, reputable firms with considerable human resources have significant overheads and charge a substantial markup for their experience.

Working With a Large Design Firm

When resources aren’t a constraint, working with a big-name design firm is well worth the money. It can protect you from protracted and painful experiences in bringing your project to fruition. A team of dedicated and experienced creative professionals will also deliver the best possible outcomes for your project.

Unfortunately, in the real world, many of us have to work with significant budgetary constraints. In this scenario, a simple or minimal motion graphics style can save you money by requiring fewer hours and specialists to accomplish.

Working With a Single Specialist

If you don’t require extensive detailing in your graphics, you may not need as many illustrators or designers. Similarly, a single specialist–such as a video editor or motion graphics artist–may be able to execute multiple tasks–such as image and sound edits–on the simplest graphics projects.

Reduced complexity will also require less coordination, resulting in fewer iterations of feedback and less reworking. Ultimately, the lowered scale of the project will lower the costs of your motion graphics.

At the same time, simpler styles of motion graphics need not be inferior to more complex work. The effectiveness of some of the most iconic motion graphics (such as the HBO opening theme graphic) is rooted in simplicity. So, if a simpler style works for your project, you might want to consider simplicity to keep prices low.

If you’re unsure of coming up with ideas yourself, you can always research minimal graphic styles that have worked well in the past. This will help you to come up with ideas that satisfy the unique requirements of your motion graphics project and save you money in the process.

Use Stock Libraries

Searchable Stock Photos in The Graphics Creator
There Are Free Searchable Stock Photos in The Graphics Creator!

Many of the elements required for your motion graphics project need not be created from scratch. You don’t need to travel around the world to get one shot, as this is unaffordable for all but the largest productions. Instead, you’d buy the individual assets you need from other producers.

There are extensive stock libraries for photos, video, sound, visual effects, music, and illustration today. Within these, you can find all sorts of assets, including specific niches, such as 3D models that can be further manipulated.

Pexels photo and video library are included for free inside The Graphics Creator.

Moreover, stock assets are available at a wide range of prices. Often, their licensing terms take into consideration the end-use of the asset. So, it can be cheaper to obtain digital assets for use in motion graphics that are intended for use on small-scale video projects.

Using stock libraries, you need not create all the elements that go into your motion graphics project from scratch. This can save you significant time and money in making motion graphics for video.

Final Thoughts

The cost of motion graphics for video varies widely depending on the duration, complexity, and scope of the project. Ideally, you should hire an experienced design firm to oversee the most complex and ambitious projects.

On the other hand, if you have significant budgetary constraints (as most of us do!) and more modest requirements, there are several measures you can take to lower your costs. As long as you have reasonable expectations, you may even be able to execute the motion graphics yourself, using simple design software and stock assets.

Wondering how much other graphics cost? Take a look:

12 Types of Software That Your Small Business Needs

Starting a small business is no small feat–you need to invest countless hours, hard-earned money, and sweat. However, when it comes to maintaining a small business, many entrepreneurs shy away from software and automation. But the right software can make the logistics of running your business easier, faster, and seamless. 

Here are 12 types of software that your small business needs:

  1. Accounting and finance software
  2. Human resource software
  3. Project management software
  4. Collaboration software
  5. Customer relationship management software
  6. Website building software
  7. Word processing software
  8. Design software
  9. Marketing software
  10. Payment management software
  11. Time tracking software
  12. Cyber security software 

This article will explore each of these software types in detail, so you can choose the ones that will help run your small business more efficiently. Keep reading to learn about how each type could be helpful for your business!  

1. Accounting and Finance Software 

accounting-concept-businesswoman-working-using-calculator-with-money-stack-office
Accounting software will let you print out reports that make it easy to see your business finances.

The main purpose of a business is to make money. Therefore, accounting software should be high on your high-priority list. Simply using an Excel spreadsheet will not help you manage your business’s finances in an accurate, streamlined way.

Here are the top 3 benefits of using accounting software in your business:

  • It promotes accuracy. When you want to make changes to your records, you don’t have to update multiple sheets manually with accounting software. Instead, your financial records will be automatically updated to reflect your changes. This reduces errors with your accounting data.
  • It saves you time. Bookkeeping and other accounting processes are time-consuming. Accounting software takes these processes out of your hands, leaving you with extra time to spend on more crucial things in your business, like generating leads, creating new products, etc.
  • It can handle your payroll. Most businesses have separate software explicitly dedicated to payroll. However, as a small business owner, you might not need a separate system. Some accounting software can run your payroll function for you. These will automate employee payments, calculate contributions, get tax information, etc.

Now that we’ve discussed the main benefits of using accounting software, finding one that works for your small business is the next step.

According to Investopedia, the five best accounting software for small businesses are QuickBooks Online, Xero, FreshBooks, QuickBooks Self-Employed, and Wave (we use Wave here at Laughingbird Software because it is simple and intuitive ). 

2. Human Resource Software

You might think that HR software isn’t necessary for a small business. However, it can provide a small business with greater management of its employees.

Here are the top 3 benefits of using HR software in your business:

  • You have greater control of the recruitment process. HR software streamlines the hiring process by integrating the company’s recruitment process with job boards and social media (for example, LinkedIn). It can also shorten the hiring process by using data to narrow the candidate pool to the best applicants.
  • It gives employees easier access to HR. For example, if employees want to apply for leave, they no longer need to go through three managers and two forms. Instead, they can quickly book it using HR software, and all team managers will receive a notification.
  • It facilitates the development of employees. HR software includes tools that make it easier to appraise employees and offer continuous feedback. This helps identify poor employee performance and rewards those who have performed well.

According to People Managing People, the three best HR software for small businesses are Monday.com, Eddy, and Open HRMS.  

3. Project Management Software 

project-planning-software-modish-business-project-management
Project Management Software will help you get things done efficiently!

Big businesses aren’t the only ones who require project management software. Small businesses also undertake projects, and project management software can help you manage your projects better, so you have a better idea of the resources, time, and costs every project needs.

Here are the top 3 benefits of using project management software in your business:

  • It helps track the time of each project. If a project takes longer than expected, this could mean higher costs and a loss of reputation for your business. However, project management software will highlight the areas of a project you’re spending time on to identify if you’re spending it on the right things and how you can potentially cut down that time.
  • You can track project costs. Project management software can highlight your project expenses and how many resources you’ll need. And this regular monitoring is crucial for staying within your project budget.
  • It increases collaboration. Things can go haywire when you don’t have a system to manage your projects because miscommunication, lost emails, and messy documents can occur. But with project management software, everyone is on the same page because updates are given in real-time, all documents are stored in one place, and everyone communicates using the same medium.

According to Zapier, there are several project management software tools to suit your needs, including, Asana, Trello, Wrike, and ClickUp. Keep in mind that each one is different in terms of capabilities and capacity, so look for the one that works best for your specific needs!

4. Collaboration Software 

Every business requires good collaboration between internal stakeholders to be successful. Collaboration software helps facilitate communication between employees and connects teams even if they work remotely. 

Here are the top 3 benefits of using collaboration software in your business:

  • It improves project efficiency. Collaboration software allows employees to communicate with each other, so they can reach project goals more quickly. Also, having a dedicated collaboration system reduces the risk of miscommunication amongst project teams.
  • It facilitates remote work. After the pandemic, industries worldwide saw an increase in remote work. And with effective collaboration software, small business owners can employ employees from different locations, which can save them money, and they will be able to communicate at ease with them.
  • It improves employee productivity. Having one communication system in place reduces the number of emails, documents, and messages from other channels. Employees can log into one system and find everything they need there.

TechRadar has made an in-depth comparison of the best collaboration software for small businesses and among them are Microsoft 365, Slack, Podio, and Flock. 

5. Customer Relationship Management Software 

CRM might seem too complicated for a small business, and you might question if it’s necessary to invest in it. However, it’s become more critical for smaller businesses because the need to manage customer relationships has increased in the modern world.

And that’s where customer relationship management software comes in.

Here are the top 3 benefits of using CRM software in your business:

  • It stores and organizes customer data. CRM systems centrally store all your customer information. In this way, you can access customer information at any moment and use them to your advantage to generate leads, follow up, etc.
  • It enhances your relationship with customers. CRM not only manages your relationship with customers but improves them. Now, you can personalize communication with customers, tailor your services to their needs, and show them you value them, increasing customer loyalty and generating more sales.
  • It improves customer service. CRM systems can automate customer service and solve customer issues faster. This makes customers happy and frees up your staff’s time so they can focus their attention on more pressing matters.

According to Forbes, the best CRM software includes Zoho CRM, Monday.com, Salesforce, and Zendesk Sell. 

6. Website Building Software 

website concept shown in a circle with man standing behind
Website design software will make you look professional and help customers quickly find what they’re looking for on your site.

It’s become less of a choice and more of a necessity for every business to have its own website. A website is your business’s home on the internet, and it’s probably the first place your prospects will interact with you. Therefore, the type of website-building software you use is crucial.

Here are the top 3 benefits of using website-building software in your business:

  • It makes you look more professional. Good website creation software can create a feature-rich website that invites customers and keeps them engaged. 
  • You can easily showcase your products and services. A website is a great way to show your offerings to customers without visiting a physical storefront.
  • It establishes your credibility in your industry. Having a good website can help you stand out from the other businesses in your niche. And it makes you look legitimate to potential customers who may be wary of your brand.

The most popular website-building software used today is WordPress, Squarespace, Wix, and Weebly. 

7. Word Processing Software

Information needs to be digitized, and crafting, sharing, and storing that information can only happen via word processing systems. And especially with most operations taking place remotely today, employees need ease of access to share documents.

Here are the top 3 benefits of using word processing software in your business:

  • It increases accuracy and productivity. Word processing software automatically corrects errors and can phrase communications more succinctly. These benefits collectively increase employee productivity due to less “manual” work being done. 
  • It stores information more securely. The days of storing files in a physical location are long gone. Storing files digitally becomes ten times easier with word processing software. It keeps documents more secure, they’re less likely to go missing, and they’re readily available to access.
  • It saves time. Word processing software makes you more efficient, as you don’t have to check errors constantly. Also, information can be easily shared with different people without going through 10 people.

The most used word processing software today are Microsoft Word and Google Docs. However, Small Business Bonfire also recommends Quip, Zoho Writer, and iA Writer. 

8. Graphic Design Software 

Laughingbird Software Website Design
The Graphics Creator by Laughingbird Software can help you design what you need for your small business in minutes!

How you design or brand your business is significantly underestimated and generally the last item on a business owner’s to-do list. However, graphic design can make or break your business more than you think.

The design of your business includes your branding, logos, advertising, social media graphics, website design, packaging, product graphics, and many more.

Here are the top 3 benefits of using graphic design software in your business:

  • It increases customer engagement. A well-designed website, logo, product cover, or social media graphic is aesthetically pleasing. It can make an excellent first impression on your customers and make them interact more with your business. 
  • It distinguishes you from your competition. You don’t want your business to blend in with others in your industry. Therefore, creating visual imagery and design that’s specific to your brand will highlight you from your competitors and make you stand out.
  • It can make or break a sale. Yes, graphic design can directly impact your sales. If you showcase designs that make you more memorable, communicate your message, and resonate with your target audience, then there’s no reason why they will choose a competitor over you.

A few examples of graphic design software are Canva, PicMonkey, The Graphics Creator, Adobe Photoshop, Adobe Illustrator, and more. 

graphic design software
Your small business needs graphic design software to help it stand out from the crowd!

9. Marketing Software 

Marketing is more than simply getting the word out about your business. Marketing software can help you increase brand awareness, get new customers, optimize your social media presence, and rank your business higher on Google.

The marketing software your business needs can be split into three categories: email, social media, and search engine optimization.

Email Marketing Software

Here are the top 3 benefits of using email marketing software in your business:

  • You can reach different groups of your target audience. You can create various email marketing campaigns to target customers in specific groups with email marketing software. You don’t need to send one generic email to your entire list.
  • It can save you time and money. Email marketing is an easy way to reach your audience because it automates all your communications. And it is an inexpensive way of marketing compared to other marketing channels out there.
  • It can dramatically increase your sales. With email marketing, you can nurture your prospects and lead them through sales funnels to get them closer to a purchase. You can also easily boost sales through upsells.

There are various types of email marketing software; however, the most common for small businesses are Drip, ConvertKit, GetResponse, ActiveCampaign, and Sendinblue. 

Social Media Management Software

Here are the top 3 benefits of using social media software in your business:

  • It can help you attract customers. Everyone is on social media today, and your brand can attract customers from different geographic locations.
  • You can assess market trends. With social media software, you’ll be able to do market research by analyzing the types of information and products that consumers are interacting with.
  • It can increase your sales in the long term. Social media allows you to engage with prospective clients and form a relationship with them. This can increase customer brand loyalty, and customers are far more likely to purchase services from a company they trust.  

According to Investopedia, some of the best social media software are Sprout Social, Hootsuite, Zoho, and Buffer. 

3d-render-social-media-icon-collection
Using multiple social media platforms can be overwhelming without social media management software!

Search Engine Optimization Software

Here are the top 3 benefits of using SEO software in your business:

  • It can increase website traffic. The right SEO software will help you find the key phrases and terms your target audience is searching for. This will help you optimize your website, which increases traffic and can help you build an email list and generate leads.
  • It can make you look more professional. If your website doesn’t show up on Google, the chances are that customers will think you aren’t a legitimate business.
  • It can increase your sales. If a customer searches for a product and your website shows up, and it’s well-optimized and user-friendly, the customer is more likely to purchase from you than your competitor.

According to Forbes Advisor, the best SEO software are Ahrefs, KWFinder, WooRank, and Semrush.  

10. Payment Management Software

woman-hands-holding-smartphone-with-paypal-apps-screen-paypal-is-online-electronic-payment-system
Paypal is one of the most common payment processors for small businesses (Laughingbird Software uses Paypal)!

Payment management software is vital for your business to create invoices, track billing, and make payment collections easier.

Here are the top 3 benefits of using payment management software in your business:

  • It saves you time and energy. It’s time-consuming to create and send out invoices manually. But payment management software can easily automate this.
  • You can expand your products and services internationally. You can expand your business’s reach because you’ll be able to accept payments in different currencies.
  • It offers different payment options for customers. Payment management software can accept credit cards, online payments, debit cards, etc. They can also set up recurring payments. And customers are more likely to purchase from you because it’s convenient for them.

The most common payment processing systems are Amazon Pay, Stripe, PayPal, and GoCardless. 

11. Time Tracking Software 

Time-tracking software shouldn’t be used to punish and micromanage employees. They should be used to analyze how work processes can be done more efficiently and how employees can make better use of their time.

Here are the top 3 benefits of using time-tracking software in your business:

  • It increases employee efficiency and productivity. When employees see how they’re spending their time, they can better optimize their workflows. And having a time tracker acts as a deadline too. Without time tracking, employees will not feel a sense of urgency to get tasks done.
  • It can help managers budget better. Time tracking gives managers an accurate measure of how long it takes to complete a specific task/project. Therefore, they’ll be able to estimate the resources needed for a task/project.  
  • It can improve the payroll process. Time tracking allows you to measure the correct hours worked by staff, which makes paying employees easier.

Fit Small Business recommends an array of time-tracking tools for your business, including, Clockify, Deputy, Homebase, and ClockShark. 

12. Cyber Security Software

floating security symbols

The massive spikes in technology today have also increased cybercrime. More and more businesses are getting hacked and losing precious data. Therefore, cyber security needs to be a top priority for your business.

According to Forbes, small businesses are bigger targets for cybercrime because they don’t perform security audits or update their resources, and some don’t even have insurance. 

Here are the top 3 benefits of using cybersecurity software in your business:

  • It protects the users of your website. Good security software will ensure that your consumers’ confidential information is protected. And when your business is secure, customers will trust you and be more willing to do business with you.
  • It protects you from malicious attacks. You can rest assured that your business is protected from hackers and viruses.
  • You can keep up with new threats. Hackers are constantly working to breach systems with outdated software. However, if you install good cyber security software, it will continuously be updated to protect you from any future attacks.

Windows Report has curated some of the most powerful security software, including ESET, Guardio, Avira Prime, and NordLayer. 

Final Thoughts

You’ve just read about the various types of software that your business needs to remain viable and grow.

Depending on the type of business you own, as well as its size and other factors, you’ll need several software products to help you run your small business. Go through the list above and make sure you have all the important ones covered. You may discover that there’s software you’re not using that will improve your bottom line and/or efficiency.

5 Differences Between Graphic Design and Marketing

Graphic design and marketing are converging terms that refer to different professions or mindsets. Although the two are vital in brand promotion, they feature a few differences that most people might not understand. So, how does graphic design differ from marketing?

Here are five key differences between graphic design and marketing:

  1. They use different tools and skill sets.
  2. They have different communication approaches.
  3. They impact potential customers differently.
  4. They have varying points of focus.
  5. They have different effects on the brand.

Graphic design and marketing have become inseparable in the business setting today, as a brand can’t succeed without either.

This article will break down the differences between graphic design and marketing. Read on to learn more.

1. They Use Different Tools and Skill Sets

Today’s market is highly competitive, and businesses have to be aggressive to win the attention of their target audiences. So, almost all brands utilize marketing and graphic design to introduce and retain their market presence. Moreover, they must develop strategies to promote their identities, win customers, and generate sales.

Now, graphic design and marketing use different tools and skill sets to promote their brands.

For instance, graphic designers utilize visuals—including logos, leaflets, brochures, and other stationery—to create a brand’s identity and first impression to the target audience. These professionals leverage creativity and graphic design principles in branding a business.

On the other hand, marketers use figures, statistics, or data in conducting market research. Then, they use the findings to improve a brand’s marketing presence and increase sales. Marketers also utilize skills such as planning and content creation to promote their brands.

Find out how to design your own brand graphics!

woman's hands holding a book showing diagram of what makes up a good business brand
Graphic design and marketing both affect a business’s brand.

2. They Have Different Communication Approaches

Both graphic design and marketing communicate the brand’s story to its audience. However, graphic designers use visual awareness to connect to individuals emotionally. So, when a graphic designer comes up with a business logo, they aim to appeal to a specific type of person before sharing it with the world.

Hence, graphic design utilizes images or visuals to persuade the target audience of the authority or credibility of a brand.

Contrastingly, marketing involves using language to communicate directly with the audience. Hence, marketers fashion the brand’s image through the following mediums:

  • Advertisements
  • Public relations
  • Sales promotion
  • Claims
  • Repetition

Marketers also have a specific pattern of approaching their target audience. For instance, they can utilize the following processes to reach potential customers:

  • Segmentation
  • Targeting
  • Positioning
  • Messaging
colorful pink umbrella in a sea of mass black umbrellas
Good graphic design and marketing help businesses stand out!

3. They Impact Potential Customers Differently

When approaching customers (both potential and active), graphic design and marketing have different impacts.

For starters, graphic designers seek to build trust and credibility among their audience through a consistent brand appearance. Therefore, a brand should have a striking design that leaves a positive mark on potential customers and viewers, whether in the online or physical space.

On the other hand, marketing creates the brand’s familiarity with customers. For example, if a business successfully communicates its message to customers (personalized or generalized), it enhances brand awareness.

Hence, marketers will persuade potential customers to try their products because they’re familiar with the brand. Moreover, they’ll be loyal to the company and continue buying from them in the future if they prove to be of high quality.

get help with marketing Design!

4. They Have Varying Points of Focus

Graphic design mainly focuses on building a brand’s identity and increasing its visibility among potential and active customers. Therefore, graphic designers create unique designs that will help a brand stand out in the market. Furthermore, these captivating visuals can turn prospects into customers.

Contrastingly, marketing is more of a business-generating tool. Marketers focus more on selling the business to prospects and potential customers. They utilize different strategies to boost sales and increase the brand’s revenue.

Apart from reaching new customers, marketers may use their analytics and data to re-target former customers. Hence, they can reach out to them through personalized messages or promotion campaigns, informing them of new products or upgraded versions.

hands holding a virtual Marketing Statistics Chart
Marketing focuses on using statistics and data

5. They Have Different Effects on the Brand

Marketing and graphic design are both vital to brand promotion. Nevertheless, their varying approaches can affect a business in different dimensions. For example, since graphic design is more about creating and promoting a brand’s identity, it assists in maintaining a consistent presence in the market.

Conversely, marketing helps build and maintain a brand’s reputation and relevance. Therefore, if a business promotes its products (or services) and meets the customers’ needs, it will win their trust and loyalty.

Furthermore, marketing is a continuous process. Hence, market research and analytics findings are crucial in a brand’s decision-making.

That said, graphic design is the cornerstone of marketing in this digital era. A business needs to compete to gain (and maintain) its presence in the market. Therefore, designers and marketers should collaborate toward the brand’s success.

Here’s a chart that summarizes the differences between graphic design and marketing.

Graphic DesignMarketing
Utilizes images to create a brand’s identity.Uses data and figures in decision-making and strategic planning.
Uses visual awareness to connect to customers emotionally.Uses language to communicate with a target audience.
Builds trust and credibility among customers.Creates brand familiarity.
Helps create a brand’s first impression and maintain visibility.Helps in selling a business and generating sales.
Creates and maintains a brand’s presence.Maintains brand reputation and relevance.